Almost every week, homeowners tell us, ‘My neighbor replaced their tile because the grout looked wrecked. Should I do the same?’ As specialists, we know that many homeowners or large space managers are confused about what it actually means to clean and restore tile & grout, which often pushes them toward costly replacement they don’t actually need.
Grout’s porous structure traps dirt, stains, and moisture, but restoration techniques can revive it without needing total replacement. Also, being seasoned professionals, we have consistently observed that most discoloration, mold, and dull tile surfaces respond well to deep extraction, sealing, and maintenance.
We have already saved many clients from unnecessary expenses of replacing entire tile flooring, but our team felt that we could help others save as well. Thus, we decided to share some valuable professional insights to clear up the confusion and help others secure their investment.
Why Tile and Grout Get Dirty Faster Than You Think?

Grout is cement‑based and naturally porous; it absorbs water, oils, and contaminants instead of repelling them, making it dirty. Grout’s absorption rate makes staining unavoidable in kitchens and bathroom tiles. Big commercial spaces face a similar challenge, as heavy foot traffic and constant dampness accelerate floor staining and elevate hygiene risks.
In fact, the EPA (Environmental Protection Agency) warns precisely that moist tile surfaces allow mold spores and bacteria to grow, creating health risks and sometimes making it almost impossible to clean, and such instances often demand complete replacement.
DIY Routine to Clean and Restore Tile & Grout
Most homeowners and property owners try to follow the best tile and grout cleaning practices to keep surfaces fresh, but these methods often fall short against excessive dirt buildup or deep stains. Still, they are effective in maintaining and avoiding the need to replace the entire flooring.
#1. Sweep and Vacuum Daily
Consistent sweeping and vacuuming to prevent dirt, grit, and sand from scratching tile surfaces and from settling deep into grout lines. Removing debris before it embeds helps extend the life of both tile and grout.
Based on what our clients share, we’ve observed that heavy grit in entryways often etches tiles even after thorough sweeping, suggesting the need for professional intervention.
#2. Mop with Mild Detergent or a Natural Solution
Mopping tile flooring with warm water and a gentle detergent lifts dirt and restores a polished look. For natural stone, it’s always best to use pH‑neutral cleaners or a natural solution (baking soda and vinegar) to avoid etching.
Every tile & grout cleaning specialist will caution against using harsh chemicals, as they can damage your tiles. Also, if the flooring has deep dullness, it won’t lift without thorough extraction.
#3. Spot Cleaning
Food, soap, and liquid spills are easiest to remove when fresh. A quick spot treatment with a damp microfiber cloth prevents stains on tile and stops liquids from seeping into grout pores, reducing the risk of dirty grout lines forming in high‑traffic areas such as bathrooms and kitchens.
However, our technicians often find that old stains penetrating grout pores resist spot cleaning, even with repeated scrubbing, and require a dedicated cleaning approach.
#4. Using Baking Soda or Hydrogen Peroxide for Grout
Baking soda paste or a hydrogen peroxide solution is considered a handy option for grout discoloration removal. Though in our professional opinion, stubborn dirt or stain buildup may still require grout steam cleaning or oxygen bleach for complete grout restoration.
#5. Resealing Grout
Applying grout sealer every 1 to 3 years repulses moisture, stops mold growth, and keeps grout lines intact. Regular sealing is extremely important in bathroom tile cleaning and kitchen tile restoration, where moisture and spills are frequent.
However, our team has observed that homeowners and property managers often ignore grout sealing or apply it casually, making it susceptible to mold regrowth and staining.
How Professionals Clean and Restore Tile & Grout?
After going through DIY routine tips and their limitations, it’s perfectly normal to question whether all the sweeping, mopping, and sealing is worth the effort, especially when grout still looks dirty and tile surfaces remain dull despite routine care, which is fair, as we think it works better as maintenance to back professional services.
This is not just our observation; if you ask any other tile and grout cleaning expert, they’ll confirm that DIY routines can only help temporarily, as they lack precision, and only professional cleaning and restoration methods can deliver long-term results.
Hence, we are sharing steps of our process, which our technicians follow to clean and restore tile and grout, so you know exactly how DIY vs Professional Tile & Grout Cleaning plays out:
Step #1. Floor Inspection
Once on-site, our team determines the tile type (ceramic, porcelain, or natural stone) and analyzes grout composition. This helps them pick the right cleaning solution and method, something DIY often overlooks, leading to etching, damage, or discoloration issues.
Step #2. Preparation
Protective coverings are placed over stainless‑steel appliances and sensitive surfaces to prevent accidental contact. Then expect them to use an eco‑friendly solution to break down oils and grease that household cleaning solutions hardly penetrate.
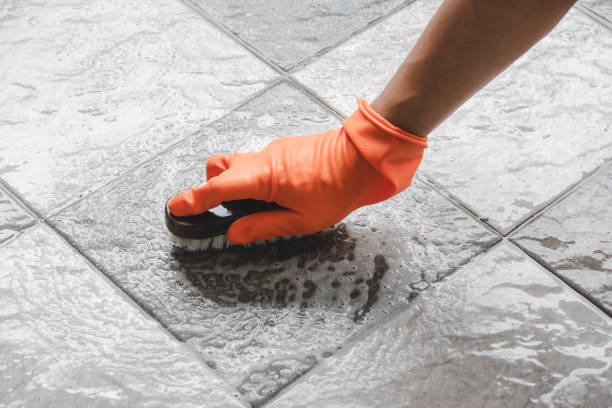
Step #3. Scrubbing
Using a CRB (counter‑rotating brush) machine, your tile and grout will be scrubbed to loosen embedded soil and grease, so it’s ready for thorough extraction. A hand brush is used for the hard-to-reach places. Unlike manual scrubbing, this mechanical agitation reaches deep into grout pores and corners.
Step #4. Extraction
After the floor is prepared for extraction, our technicians use a truck‑mounted system that delivers high pressure and heat to flush out contaminants, then extracts all water. This flushes dirty water residues, an outcome hard to achieve with simple mopping. If there’s excessive water, our crew mops it out until its removed.
Step #5. Sealing
After extraction, our team seals the tile and grout to prevent wear and tear so that your flooring continues to look good for years. They use the best-quality sealants and apply them to improve strength, unlike DIY resealing, which lacks precision to maintain floor strength.
Step #6. Final Inspection
Once our cleaning crew is done, they inspect the flooring to ensure every inch of the surface is dealt with. You can even ask them questions or share your concerns, and they will resolve them until you feel satisfied with their responses.
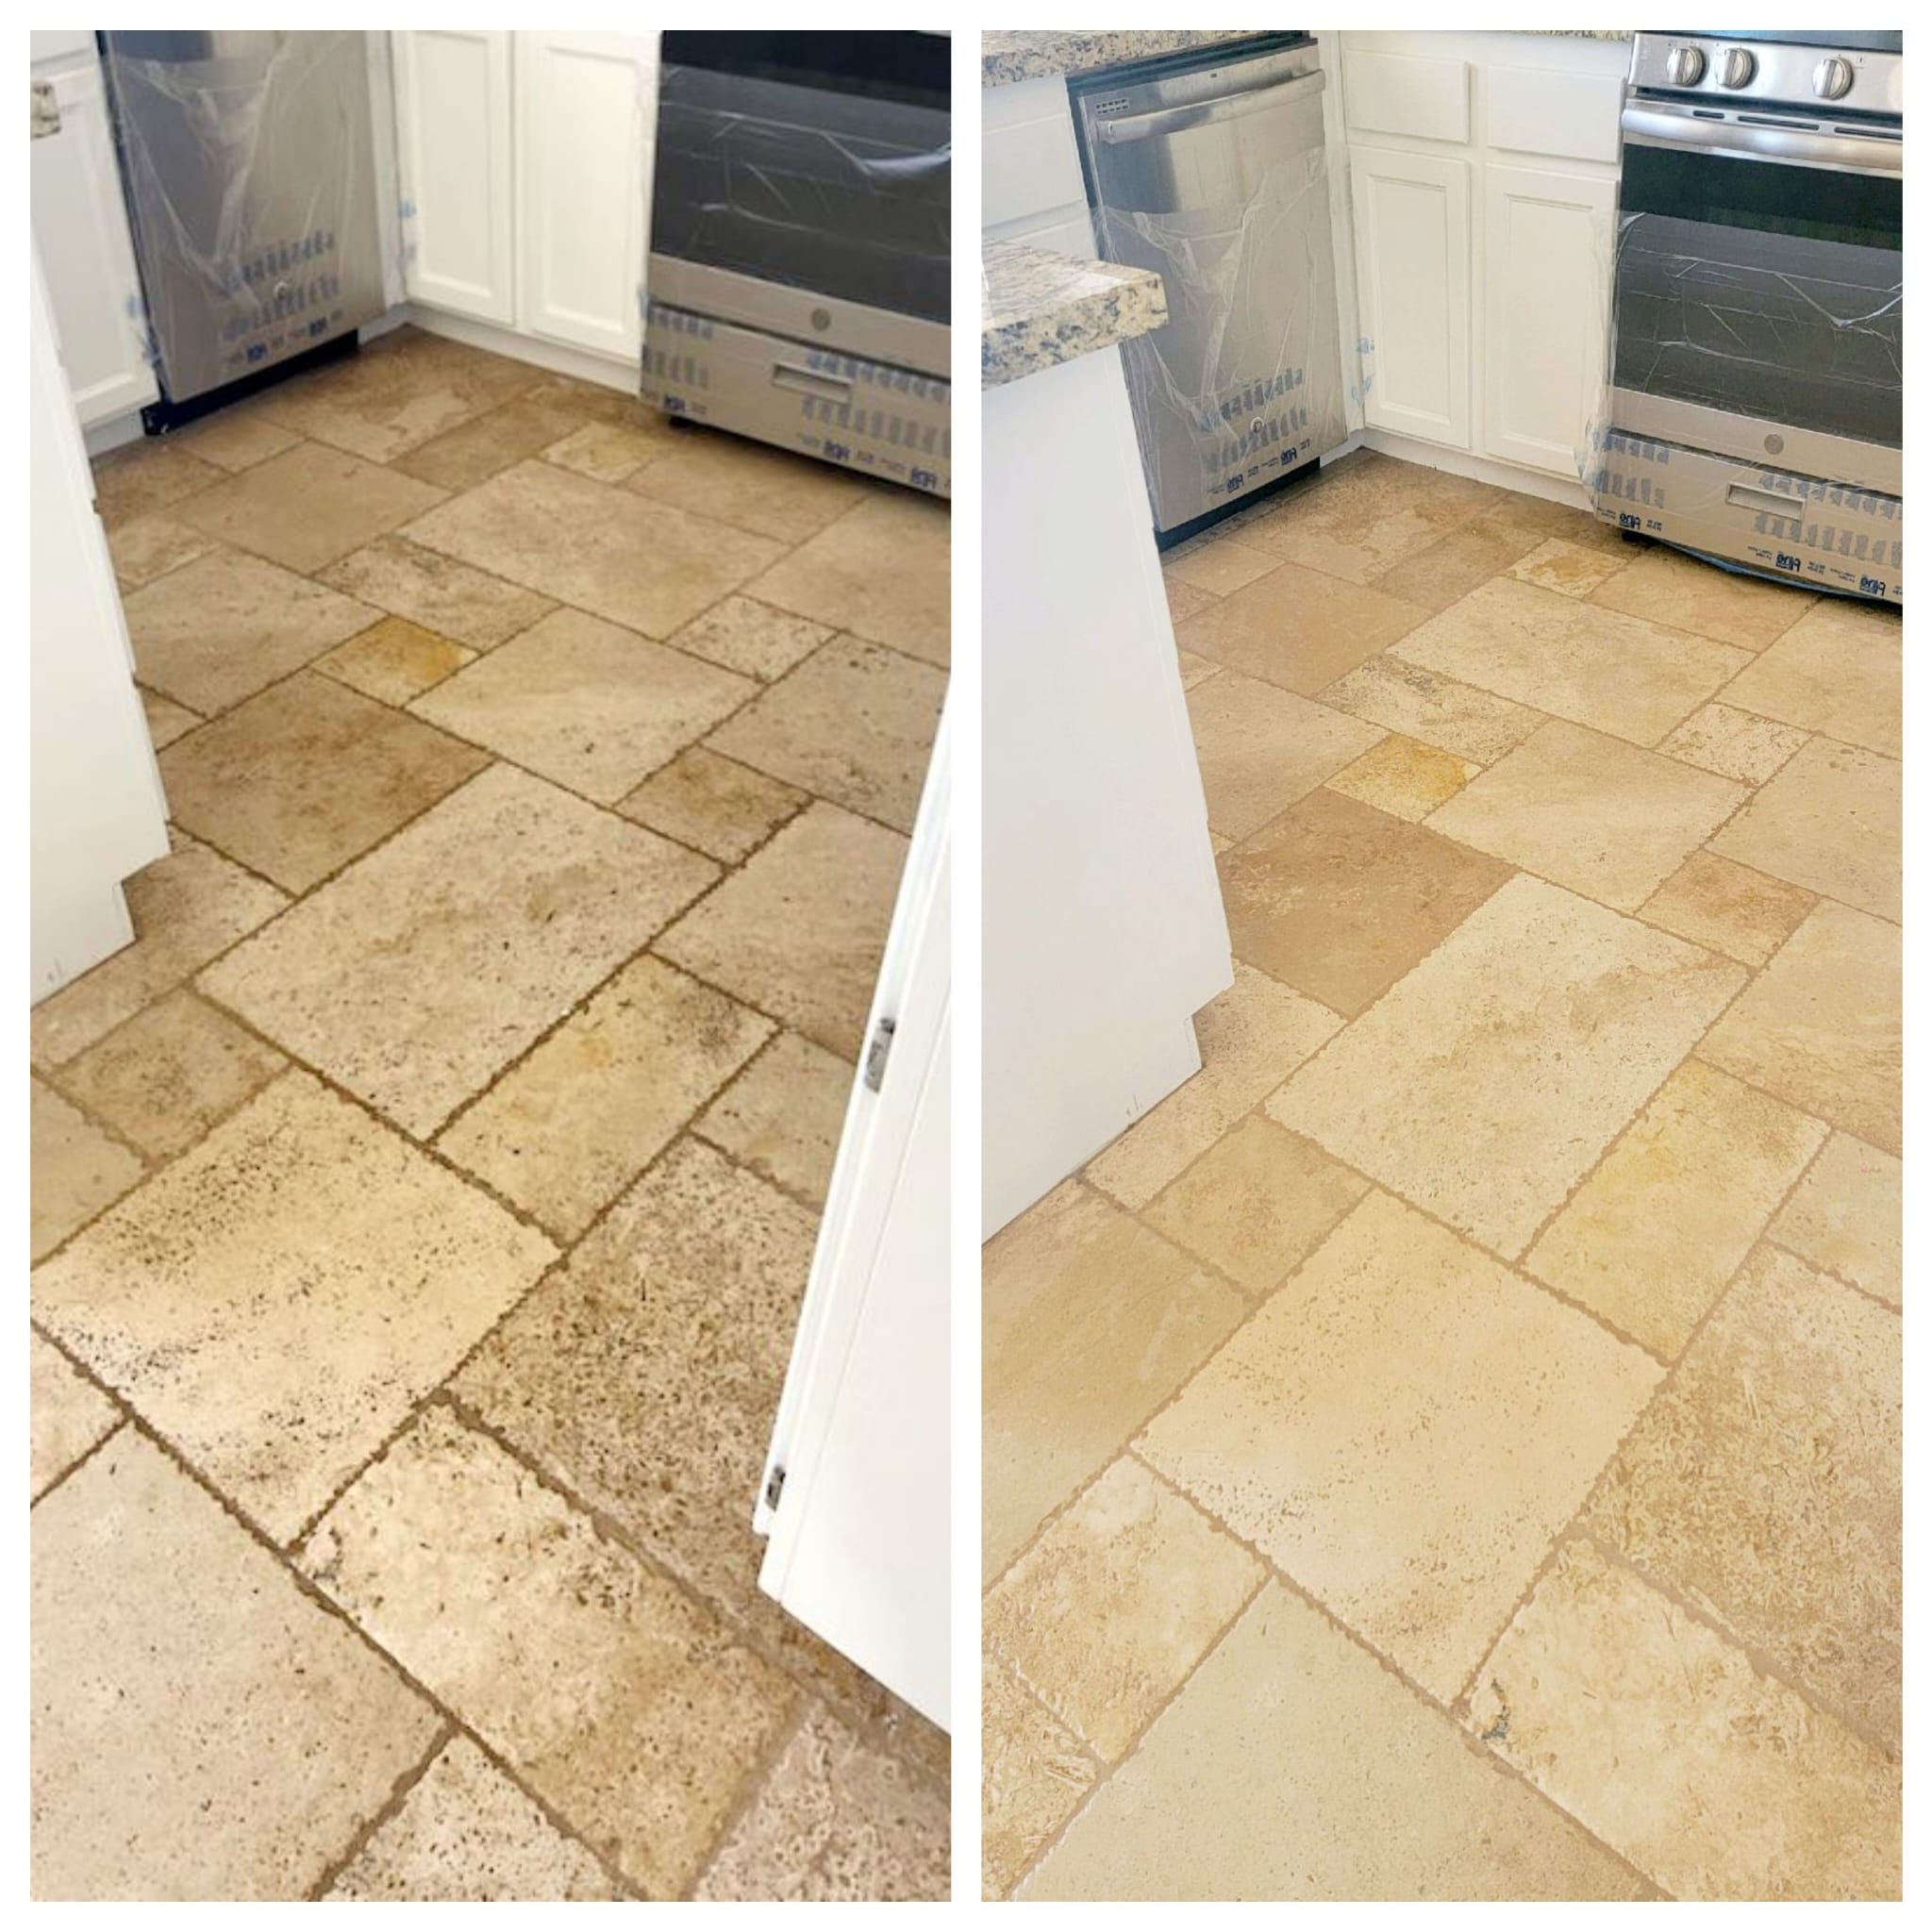
Leaving tile and grout care to professionals like us will provide a sense of peace. Still, for better decision‑making, it’s crucial you know when restoration is enough and when replacement is necessary.
Our specialists explain it in simple terms: restoration is for floors that are structurally sound and only need deep cleaning and sealing to restore the original appearance and durability, whereas replacement is considered when there are issues such as cracked tiles, missing grout lines, or extensive surface damage.
Things to Consider Post Professional Tile & Grout Cleaning
As we discussed earlier, it’s best to apply a DIY cleaning routine to complement the professional cleaning. However, there are other aspects that our team believes you must consider to maintain the surface:
- Avoid dragging heavy furniture or appliances across tile to prevent cracks and chips.
- Use mats or rugs at entrances to reduce dirt tracked onto tile surfaces.
- Avoid using abrasive pads or tools that can scratch tile surfaces and wear grout.
- Don’t leave water on tile floors, as it can seep deep, weaken sealing, and cause mold in grout lines.
- Don’t neglect resealing schedules; delaying sealing makes grout weaker.
Allow Us To Be Your Trusted Partner to Fix Tile & Grout Issues
There are effective ways to clean and restore tile & grout, but it’s always better to allow professionals to handle the process to avoid escalation. Also, when it comes to deep restoration, sealing, and long‑term protection, DIY routines have limitations, though they make a good case for light maintenance as a post-care strategy.
Monster Steamer Team has been in business for 15+ years, and alongside our team of technicians, who are IICRC certified, we’ve managed to serve more than 6000 homes and businesses across San Diego. So, you can expect the best tile and grout cleaning services from our side without any compromise.
Give us a call to make your tile surface shiny, spotless, safe, and durable again.
FAQs
1. Should I seal my grout after professional cleaning?
Sealing grout after professional cleaning isn’t mandatory, but it’s generally recommended because it helps preserve the results longer. Think of it as an added layer of protection that extends the life of your tile flooring.
2. What types of tile can be professionally steam cleaned?
Professional steam cleaning works best on tiles such as ceramic, porcelain, and many natural stones. Delicate or special finish types of tiles may need alternative methods, so it’s better to let trained technicians assess the surface and outline a meticulous approach.
3. How long does a professional tile and grout cleaning take?
A professional tile and grout cleaning session might last about 1 to 3 hours. However, this may vary based on the size of the area and how dirty the grout lines are. For instance, larger spaces or heavily stained floors may take longer, but technicians usually look to finish quickly.
4. Does dirty grout affect indoor air quality?
Yes, dirty grout can lead to poor indoor air quality as it may trap moisture, mold, and allergens. Keeping grout professionally cleaned and properly sealed helps navigate these risks and foster a healthier environment at home.